With the exception of Location Testimonials (or Testimonial hooks for specific lists on your website, the Elementor Testimonial Block is the primary method for rendering Testimonials on your website. With all the Testimonial options we've introduced via a number of FAQs, the Elementor Block may be used in isolation of any Yabber tool to manage the sliders shown your website.
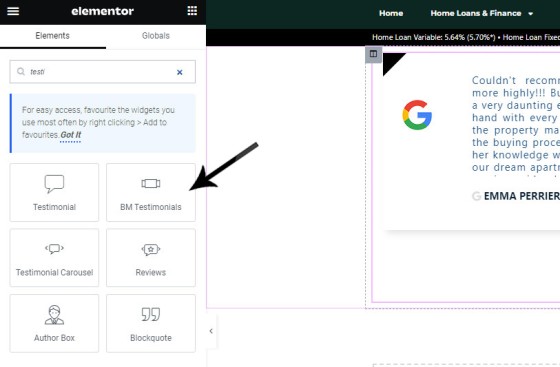
Pictured: Locate the 'BM Elementor' block by searching for 'Testimonials'. Drag and drop the block into any position on your page and the Testimonial options will render. Note that Elementor provides its own Testimonial features, but the default Elementor blocks are steam-driven in nature and do not integrate with Yabber.
The Elementor block will return a Yabber List, a Location List, or a Custom List (the latter is created entirely in Elementor). In each case, you will be required to select a style (with 'Default' the most common), and in the case of Location Lists, you may select the style that was assigned specifically to that List via the Locations module. Whenever you're placing a Location slider, we recommend select the 'Assigned Style' option as this will ensure that any change made to the Location assignments will also alter the style.
Elementor List Options
The Elementor menu presents three primary list options.
Yabber Testimonial List
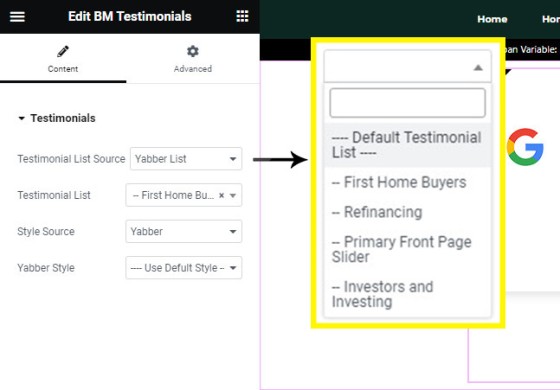
The Yabber testimonial List is any list created in Yabber. Before any list is available on your website the lists must be updated.
Pictured: The Yabber testimonial List is any list created in Yabber. Before any list is available on your website the lists must be updated.
Yabber Location List
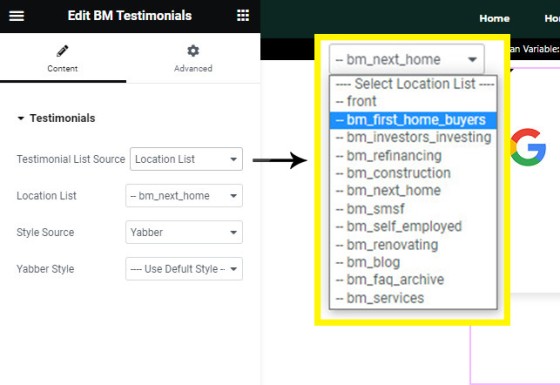
A Location list is intended for a specific location as identified by slug, such as front or first_home_buyers. The slider shown will always reflect the list assigned to that location (it's expected that you'll use location lists in relevant locations... and if a location is required that doesn't exist, you should create a custom location. The location assignment gives you enormous control over the style, Statement, and list.
Pictured: A Location list is intended for a specific location as identified by slug, such as front or first_home_buyers. The slider shown will always reflect the list assigned to that location (it's expected that you'll use location lists in relevant locations.
Custom (Elementor) List
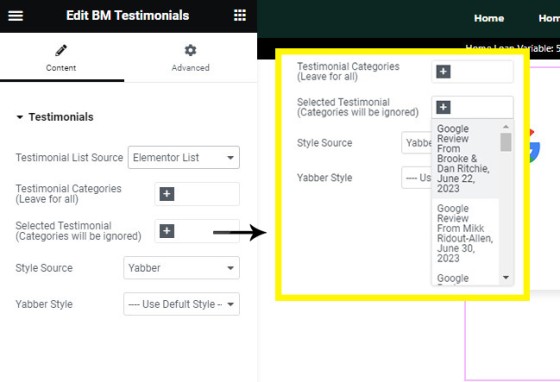
A custom list is built entirely in Elementor and does not reference Yabber. You create sliders by assigning specific social platform categories, or individual testimonials.
Pictured: A custom list is built entirely in Elementor and does not reference Yabber. You create sliders by assigning specific social platform categories, or individual testimonials.
Elementor Style Options
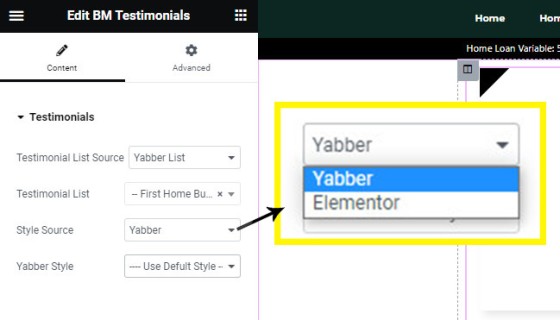
When rendering a slider with Elementor, we have the option of assigning a Yabber style (one created in Yabber), or creating a custom style using the Elementor options. The Elementor options are usually used if you don't have a Yabber subscription or access of any kind.
Pictured: When rendering a slider with Elementor, we have the option of assigning a Yabber style (one created in Yabber), or creating a custom style using the Elementor options.
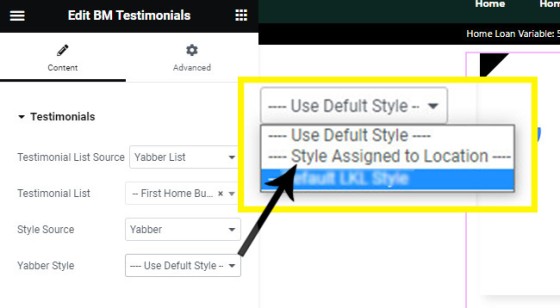
If selecting a Yabber style, you simply select from those styles you have created in Yabber. It is most common to select the 'Default' list. In the case of 'Location Lists', you should generally select the 'Assigned' option - this will ensure that the Location options are always applied to a Location slider.
Pictured: If selecting a Yabber style, you simply select from those styles you have created in Yabber. It is most common to select the 'Default' list. In the case of 'Location Lists', you should generally select the 'Assigned' option - this will ensure that the Location options are always applied to a Location slider.
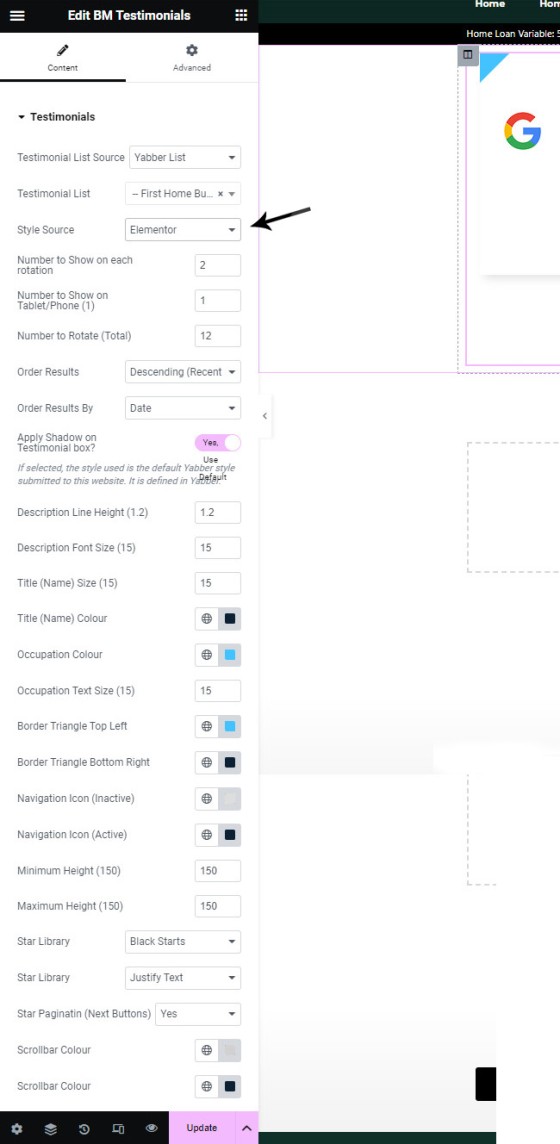
When the custom 'Elementor' style option is selected, the style is assigned back to Elementor rather than Yabber, and styles are created for each occurrence of a Testimonial slider. This is generally discourage as you won't have global control over styles, meaning that you won't be able to change styles on more than one Testimonial slider with a single update.
Pictured: When the custom 'Elementor' style option is selected, the style is assigned back to Elementor rather than Yabber, and styles are created for each occurrence of a Testimonial slider.
The entire for is conditional in nature in that selecting one field will selectively show other relevant fields.
When selecting changes in Elementor, the preview is shown immediately.
Testimonial Slider Shortcode
It is generally an uncommon occurrence for any user to find the need to use their own shortcodes. By default, all location sliders built into the framework by default will use a shortcode similar to the following: [bm_testimonial_location id=“front“] - this will render the 'Front Page' slider with associated list and Statement.
The shortcode of [bm_testimonial_slider] with attributes is used to render a standard slider, although the attributes are considerable and complicated, so this particular shortcode is best avoided.
Shortcodes are listed from the Review panel. You will find Location shortcodes linked from the Locations panel.
■ ■ ■
Related Testimonial FAQs
Related FAQs and features relating to the Testimonial Module.
When Testimonials are received - regardless or whether of not they're published to your website - we will manufacture a suite of testimonial images that are suitable for social media. These images are all sent to your Vista Social Media Calendar once created. The Vista assignment will be blank, meaning that they won't… [ Learn More ]
With the exception of Location Testimonials (or Testimonial hooks for specific lists on your website, the Elementor Testimonial Block is the primary method for rendering Testimonials on your website. With all the Testimonial options we've introduced via a number of FAQs, the Elementor Block may be used in isolation of any Yabber tool to… [ Learn More ]
The Testimonial module is extremely extensive. The framework permits you to assign a single style to all Testimonial sliders, or you may assign individual styles to Sliders where necessary. The Testimonial Elementor FAQ tends to expose how the system functions - this FAQ deals only with how to create and manage the styles.
Creating… [ Learn More ]
In order to create testimonial lists, it is assumed that a number of steps were previously completed. We should have connected (at a minimum) Google and Facebook. We should have defined Testimonial filtering rules, and we should have published testimonials on your website. Finally, we will have created at least… [ Learn More ]
In order to create testimonial lists, it is assumed that a number of steps were previously completed. We should have connected (at a minimum) Google and Facebook. We should have defined Testimonial filtering rules, and we should have published testimonials on our website. This process will take no longer than a… [ Learn More ]
Publishing Testimonials to your website requires that you have first connected the necessary social networks and set up testimonial filtering rules. The filtering will start sending testimonials to your websites as soon as they're received by Yabber. All testimonials are sent as drafts and will only publish once each testimonial is approved by you… [ Learn More ]
Before any testimonial makes its way to your website, we must first create filtering rules. Before any filtering can be applied, we must first connect Google and Facebook (at a minimum). This will populate our registered business locations and assign Yabber with the permissions that are necessary to periodically retrieve reviews. Reviews from… [ Learn More ]
The testimonial module is the most versatile in the finance (or any other) industry. We suggest you use it and take full advantage of the system. The Testimonial module will perform the following functions: Automatically pull reviews, testimonials, and recommendations from a growing list of services. The system will publish each review to all of… [ Learn More ]


