The website Teams page on your website is made up of two primary parts: the team archive, or a list of all your team members; and the individual team bios. This FAQ will outline the methods used to build a compelling Teams page.
Even for managed clients, it['s highly likely we'll have you write the bios for those staff members you choose to include on your website.
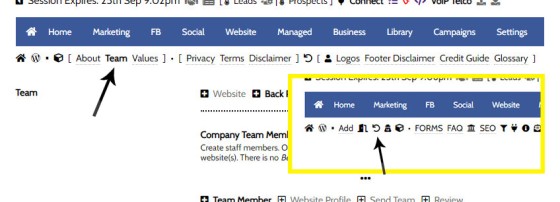
The Teams module is accessed by following the 'Back Pages' menu icon (a backwards arrow) within the 'Website' module.
Pictured: The Teams module is accessed by following the 'Back Pages' menu icon (a backwards arrow) within the 'Website' module. All the Team options are presented within just a few panels.
Since Yabber is a multi-website system, all single team member and bios may be sent to multiple websites. This will make it easy to managed your assets if you're running a Satellite (positioned) program of any sort.
The Result
The result of the grouped archive page is as follows:
Pictured: The Team Member archive will show all active team members in the order defined by you. Each team member will link to a single biography page. A large number of options apply that'll alter the manner in which the archive is presented.
Our default website framework will show the archive at yourwebsite.com.au/team.
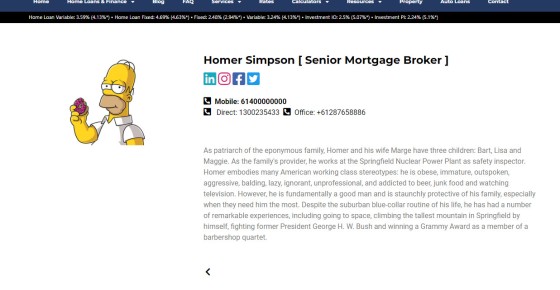
Selecting any team member will return the individual bio page.
Pictured: Selecting any team member will return the individual bio page. Presentation varies enormously, and what you're looking at is a 'naked' page without any options applied. Options are detailed shortly.
Creating a Team Member
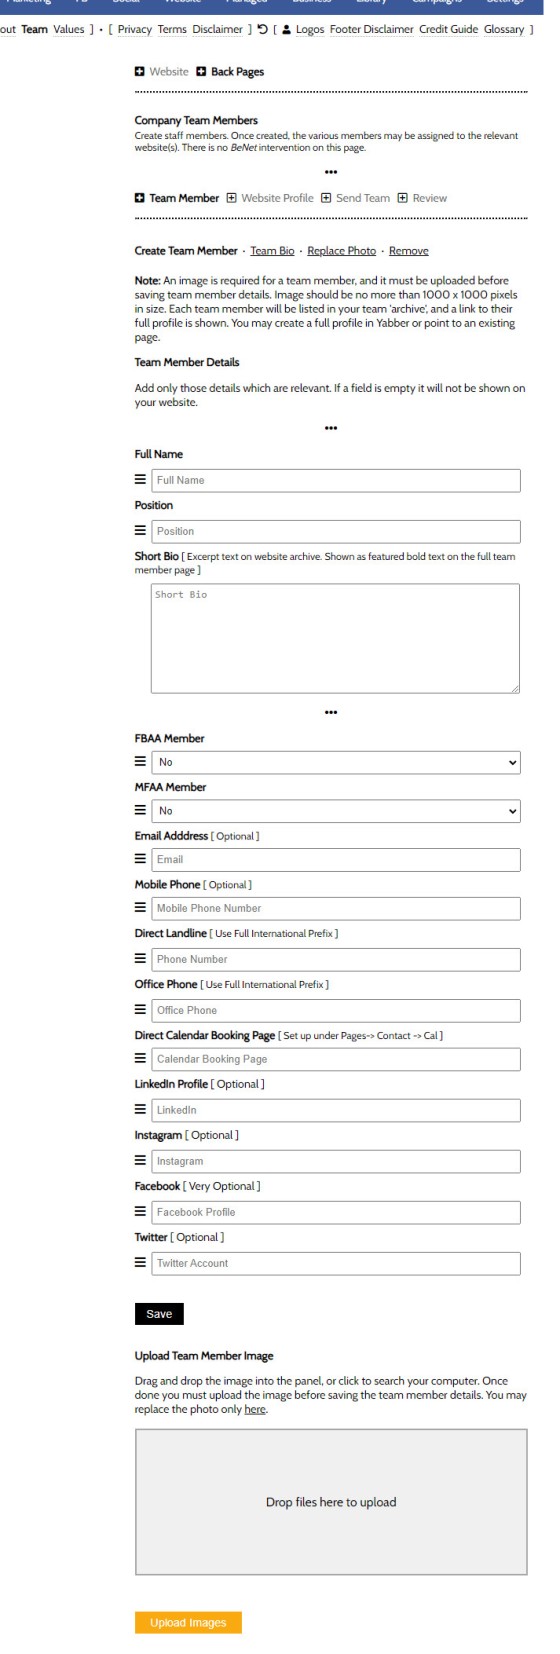
You should create a Team Member via the 'Team Member' panel. A few sub options will be shown, such as the option to create full bio or alter the profile image.
Pictured: You should create a Team Member via the 'Team Member' panel. A few sub options will be shown, such as the option to create full bio or alter the profile image. A large number of options apply, including a link to a booking page for that client. It is expected that you will create a booking page under the 'Pages' menu if required (using our calendar-integrated forms, of course).
An image is required for a team member, and it must be uploaded before saving team member details. Image should be no more than 1000 x 1000 pixels in size. It's okay to create a dummy team member if you're looking to experiment because your team is selectively sent shortly.
Create a profile (preferably your own) and 'Save'. You may modify at any time, so don't worry about perfection just yet.
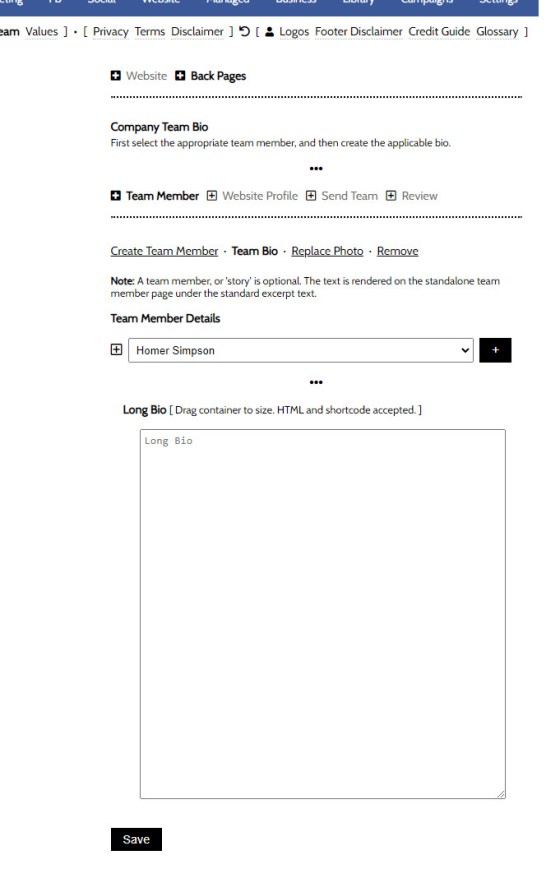
You should select the 'Team Bio' page in order to create a long bio for each of your team members. The text area accepts plain text, although you may include HTML and WordPress shortcodes if required (for example, you might include a YouTube video with a YouTube shortcode).
Pictured: You should select the 'Team Bio' page in order to create a long bio for each of your team members. The text area accepts plain text, although you may include HTML and WordPress shortcodes if required (for example, you might include a YouTube video with a YouTube shortcode).
Once any individual team profile is created, we must send it to the correct website (Yabber is a mult-website system, so we need to know where the Team Member lives).
Sending Team Member Details to Your Website
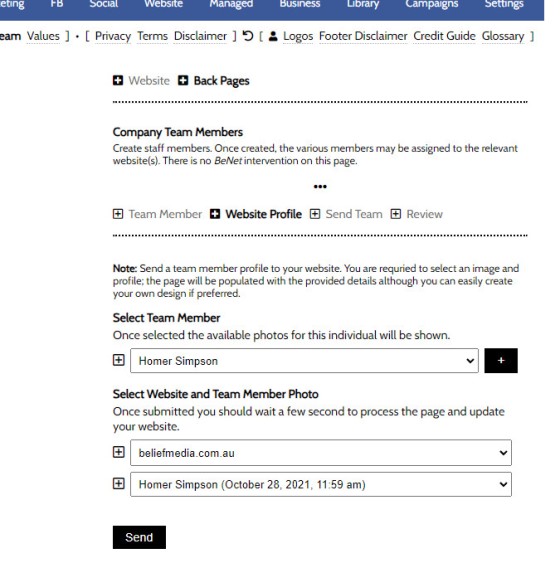
Send all individual team members to your website via the 'Website Profile' panel. Select your website, the team member and their profile photograph, and Send. This action will create a 'post' on your website in the Teams taxonomy (the Teams website module).
Pictured: Send all individual team members to your website via the 'Website Profile' panel. Select your website, the team member and their profile photograph, and Send.
The page will immediately be created and will be visible.
Creating the Archive Page, and Defining Meta Options
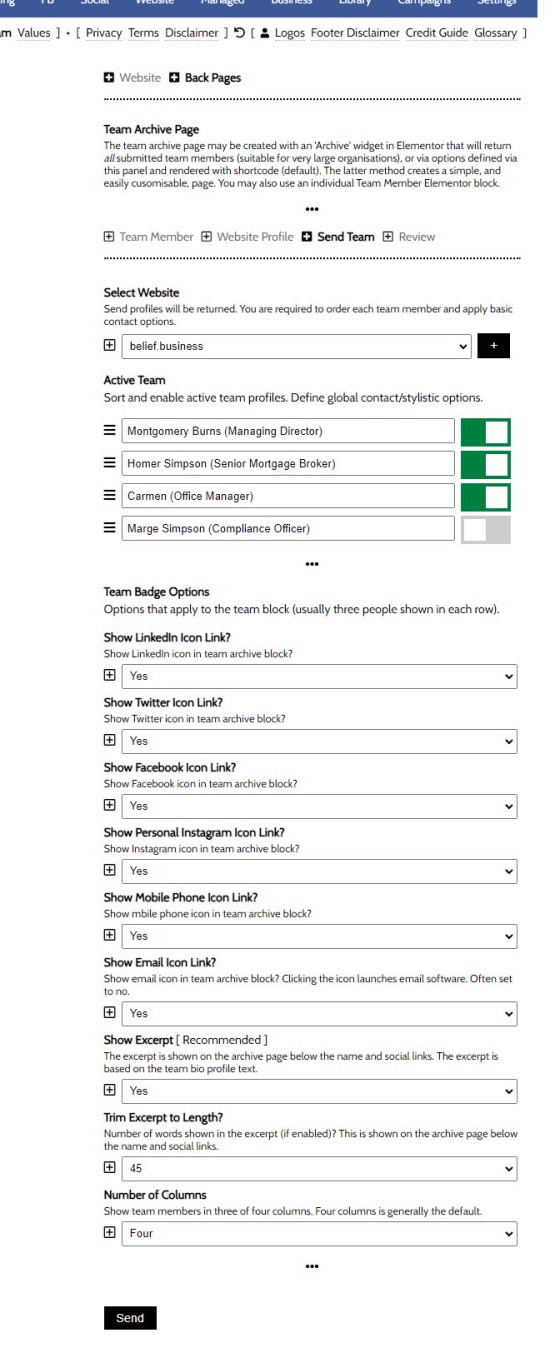
Your entire team archive is built on options defined in Yabber - it does not use standard WordPress or Elementor formatting. For this reason, we are required to selectively send our team to our website and define various presentation options.
Pictured: The Send Team panel provides an options to enable and disable certain team members, and then send them to your website. This will create the grid archive page of all your Team. Drag-and-drop the team members into the order in which you would like them shown on your archive. You should define all the options that will selectively show various icons and contact details for each team member.
Pictured: Drag-and-drop the team members into the order in which you would like them shown on your archive. Disable those team members that should not be shown.
Elementor Team Block Option
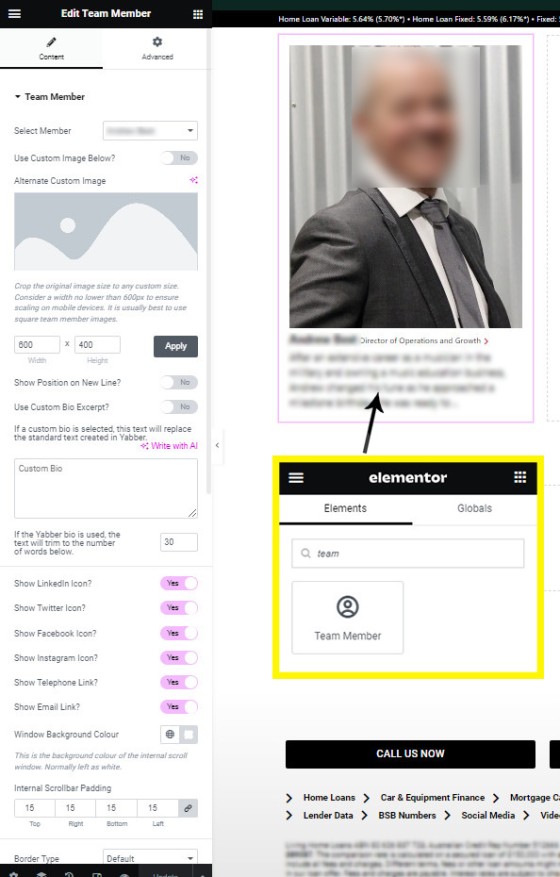
Our custom Elementor widget provides an alternate method of rendering all team members to an archive page, or a single team member to any page. Locate the 'Team Member' block, drag onto your page, and you're done. Despite the fact that the team block is created in Elementor, those values provided in Yabber are applied by default until overridden by custom values.
Pictured: Our custom Elementor widget provides an alternate method of rendering all team members to an archive page, or a single team member to any page. Locate the 'Team Member' block, drag onto your page, and you're done. Despite the fact that the team block is created in Elementor, those values provided in Yabber are applied by default until overridden by custom values.
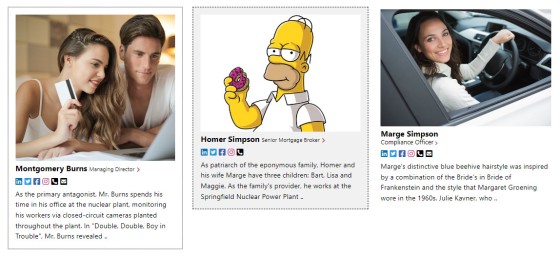
When creating an Elementor team profile it's expected that you will keep the image to the same dimensions to ensure consistency, and an option to crop your image to size is provided for this purpose. An example of a few 'inconsistent' layouts might be as follows:
Pictured: The above example simply shows a few widget renderings. No consistency was maintained so they're all of various shapes and sizes. The image scaling tool should be used to set fixed dimensions.
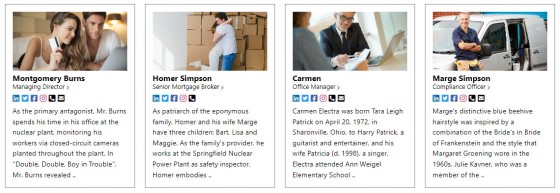
Pictured: The row of four team widgets above shows consistent image size. In company with a fixed excerpt length (defined in Yabber or the Elementor block), the widgets will maintain a cleaner appearance. The background color, border style and 'position' field are customisable. Three widgets in each row, with some whitespace padding in between each, tends to work best. If using the shortcode option, the number of widgets applied to a row are defined in Yabber.
■ ■ ■
Related Website Pages
Website Pages are generally those other than your front entry page. Some of these pages are listed below.
We introduced the Calculator archive in an FAQ titled "How to Add MFAA or FBAA Calculators to Your Website. The page links to all the available calculators on your website. The returned single calculator pages are quite naked in design; they include a title block, calculator, right sidebar menu, and optional lead magnet form.… [ Learn More ]
As with Social Media, it's rather absurd that we'll invest time, effort, and energy into creating video content and then let it rot away on a social platform that doesn't give it the exposure that the video deserves. For this reason, our website framework supports a full-featured video archive that'll show all your videos in… [ Learn More ]
We've said it over and over again, but we'll say it again regardless. You don't want to be a rate-driven broker, and you don't want to attract rate-focused mortgage customers. However, that doesn't mean that we selectively deliver self-serving information on our website or in the funnel at the expense of the information that well… [ Learn More ]
The notion that you'll create social media content to various networks and effectively hand over ownership is a little absurd. All your social posts sent from any of our systems - such as Yabber, Instagratify, or Vista - are all optionally sent back to your website into a fully hashtag-searchable archive. This give your website… [ Learn More ]
Your website includes an Employment archive for vacant job listings. It isn't a replacement (necessarily) for Seek or other similar services. Rather, it's a means to showcase all available roles on a single page for those that are researching your business, or for those occasions where you make employment opportunities available via organic channels. More… [ Learn More ]
your website includes a Download Archive at yourwebsite.com.au/download. Given the default name of 'Download Resources' which you may alter via the Titles Module, the archive lists those downloads that you choose to make available via direct link or subscription. It's an excellent SEO feature and a brilliant user resource. We'll often have clients tell… [ Learn More ]
The Statement of Values permits you to present your company Mission Statement and cultural Statement of Values. The panel is one of the oldest in Yabber and hasn't changed since Version 1.4 of the framework, so it's due for an update. You will find the 'Value' module in the back-pages module linked to from the… [ Learn More ]
The Yabber facility to create an about page is currently quite basic and due for an update. The purpose of the tool is to create the text on your website's 'About Us' page. You will find the 'About' page by following the 'Back Pages icon (back arrow) from the Website module.

The website Teams page on your website is made up of two primary parts: the team archive, or a list of all your team members; and the individual team bios. This FAQ will outline the methods used to build a compelling Teams page. Even for managed clients, it['s highly likely we'll have you write the… [ Learn More ]


